From time to time, you’ll need garage door spring adjustment to restore the functionality of your door. But the question is, can you do it yourself? And if so, how can you do it?
In this post, we will give you a general view of how our team conducts garage door spring repair and why it’s best to leave it to professionals.
Steps to Tighten Your Garage Door Spring
Tightening your garage door spring is not a complicated process, but it requires careful attention and adherence to safety guidelines. Here’s how we usually perform this adjustment:
Step 1. Preparation
Before you begin, gather the necessary tools such as safety glasses, gloves, a winding bar, and a ladder. It is crucial to wear safety gear to protect yourself from any potential accidents. Take note that you should never skimp on safety precautions when tightening garage springs
Step 2. Identify the type of spring
Determine whether you have a torsion spring or an extension spring system that needs adjusting.
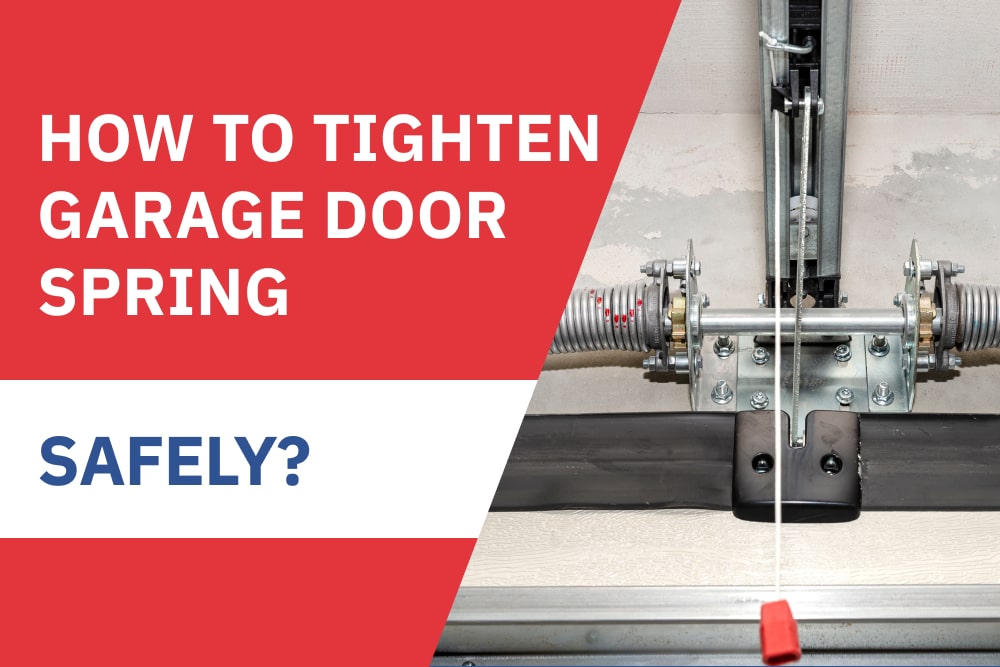
Torsion springs are located above the garage door, while extension springs are positioned on either side of the door. The method to tighten each type of spring varies, so identifying the correct type is essential.
Step 3. Release tension
For torsion springs, we use a winding bar to release tension by inserting it into one of the winding cone holes and turning it slowly until the tension is reset. Take note that we do this one quarter turn at a time to prevent the spring from snapping out of its wound.
For extension springs, you need to open the garage door fully. Next, clamp locking pliers onto the track just below the bottom roller on each side to hold the door in place.
Step 4. Adjust the tension
With the tension released, you can now adjust it to the desired level. For torsion springs, insert the winding bar into one of the winding cone holes and turn it in the direction that tightens the spring.
Meanwhile, for extension springs, move the S-hook or adjustable clip to increase or decrease tension.
Step 5. Test the tension
After adjusting the tension, test the door by opening and closing it several times. Your door should operate smoothly without any jerking or imbalance. If needed, make further adjustments until you achieve the desired tension.
Also, if your door slams shut when closing, then it means you need to apply more tension to the springs. However, if it opens too fast, then you might be using too much tension. Overall, it’s best to adjust the tension in small increments and then test it to get the best configuration.
Step 6. Repeat for both springs
Most garage doors have two torsion springs placed on either side. We adjust one at a time for safety and accuracy. The same goes for extension springs, though these parts aren’t as sensitive or dangerous as tension springs.
Is DIY Garage Door Spring Tightening Safe?
While some homeowners may be tempted to perform this job themselves to save money, it is important to understand that DIY garage door spring tightening can be dangerous and potentially life-threatening.
Garage door springs, especially torsion springs, are under intense tension and can cause severe injuries if mishandled. The force exerted by a tightly wound spring can easily lead to broken bones, lacerations, or even death if it suddenly snaps out of control.
This is why we strongly recommend consulting a professional garage door technician for any spring-related repairs or adjustments. The same goes if you need a garage door spring replacement.
Take note that garage door technicians have the knowledge, experience, and specialized tools necessary to handle garage door springs safely. Overall, the cost of garage door spring repair from professionals is a worthy investment.
Tips on Tightening Your Garage Door Spring
To ensure the safety of our technicians and everyone on the property, we always observe utmost safety precautions. Also, we recommend that property owners do the following on their garage doors:
- Regular inspections. You should perform visual inspections on your garage door springs at least once every three months. Look for signs of wear and tear such as rust, fraying cables, or gaps in torsion springs. If you notice any issues, contact a professional technician immediately.
- Lubrication. You can also apply a silicone-based lubricant to all moving parts of your garage door system. This includes the springs, hinges, rollers, and tracks. Overall, lubrication helps reduce friction and extends the lifespan of these components.
- Balance tests. Test the balance of your garage door regularly by disconnecting the opener and manually lifting it halfway. If the door stays in place or slowly moves up or down, it is properly balanced. However, if it falls or rises quickly, there may be an issue with the spring tension that requires professional attention.
- Avoid DIY adjustments. As we’ve mentioned earlier, adjusting or repairing garage door springs should be left to professionals due to safety concerns. Attempting to fix them yourself can lead to serious injuries and further damage to your garage door system.
- Timely repairs. If you notice any signs of malfunctioning or unusual noises during operation, do not ignore them. Addressing these issues promptly can prevent costly repairs down the line and ensure the safety of your garage door. Also, timely repairs can help your garage door springs last longer.
Get professional garage door repair today!
If you need garage door spring adjustments, you can call experts like California Garage Door Repair. Our technicians are on-call 24/7 because we know that garage door problems can happen anytime.
We can perform adjustments on your springs or provide an entire replacement as needed. With us, you have a one-stop shop for all your garage door needs.
As a local and family-owned business, we provide the same level of service to every garage door as we give to ours. You’ll have peace of mind that your garage door is in good hands – at the best price!
If you’re interested in a free, no-obligation quote, call us today! Our specialist can also answer any questions regarding your garage door.
