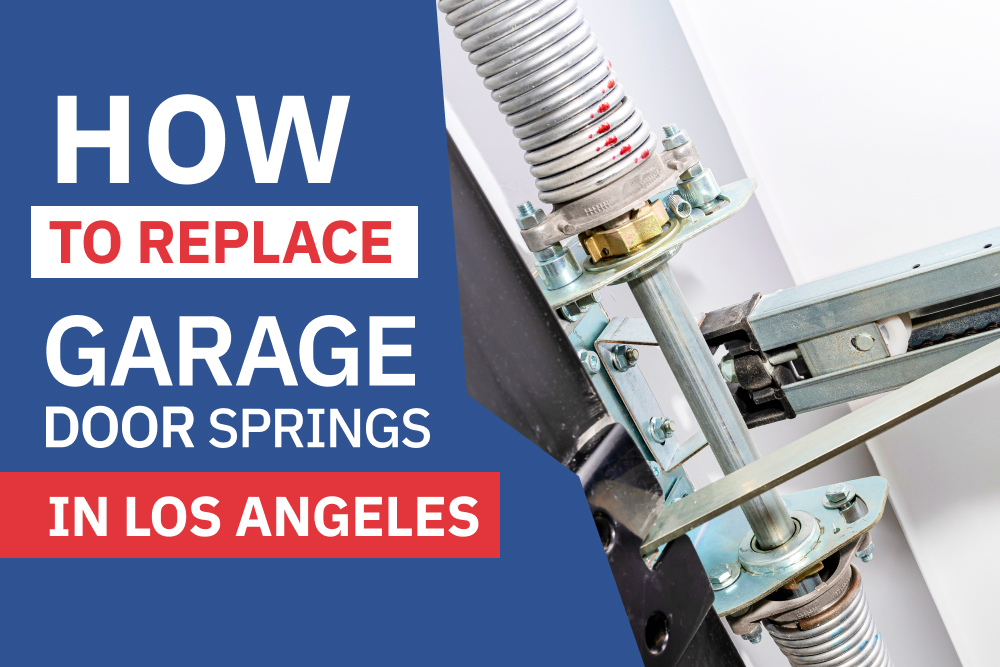
Damaged or broken garage door springs are a massive inconvenience. But instead of wondering how to replace garage door springs on your own, it’s wiser to call an expert for the right solution.
DIY torsion spring replacement may seem cost-effective. But on the flip side, it’s hazardous since garage door springs have high tension.
You should call an expert like California Garage Door Repair instead. Below, we discussed how our replacement process goes and what you should know first.
Steps in replacing garage door springs
Many homeowners don’t think about their garage door springs until it’s broken. It’s a snag you wouldn’t want to face in a morning rush or before a very important meeting.
Here at California Garage Door Repair, we’re always ready to help. For broken garage door springs, this is the usual replacement process we perform:
Step 1. Unplug the door opener
Before we start, the first thing we do is unplug the door opener. We do this to avoid accidental operation, which is extremely dangerous and can lead to injuries during spring replacements.
We simply unplug the opener, and it’s good to go. But if you have a battery backup, you should pull the emergency release cord overhead (the rope with a handle).
This will disengage the garage from the opener entirely to prevent accidental operation.
Step 2. Secure the garage door
Next, we ensure that the door panels will not move while we’re working on the springs above. We do this by locking a vice grip right above one of the rollers.
If you’re planning to try DIY replacements, never skip this part. If your springs are too loaded with tension, the door will go up really fast. You wouldn’t want it coming at you while working on the springs.
Step 3. Unwind the unbroken spring
After securing the garage door, we begin unwinding the unbroken spring. We do this only if one of the springs is broken. There’s no need to unwind the damaged springs since the tension has already been released.
To unwind an intact torsion spring, we perform the same process as when winding it, but in reverse. We hold a winding bar in place in one of the winding cone slots before loosening the set screws.
It’s essential to have a winding bar holding the cone in place at any given time while unwinding the spring. If you let go, the spring will snap due to the tension, which can lead to injuries.
Once the set screws are loosened, we use another winding bar to start turning the springs. Slide the first winding bar down and prop it to the wall. After that, put the second bar in, slide it down, prop, pull the first bar out, and repeat.
Most 7-feet garage doors will have 30 quarter turns on their spring. When unwinding it, we perform the same number of quarter turns.
Step 4. Unbolt the springs and cable drums
After unwinding the intact spring, we unbolt the center stationary cone. This is the part that holds both springs together.
For this, we typically use a 9/16 wrench on an impact driver. Once the screws are off, pull the springs apart so it slides freely on the torsion tube.
Next, we loosen up the screws on the cable drums until it slides along the tube. We do this on both drums.
Step 5. Disassemble the spring
Once everything is loosened, we take the springs apart. Simply pull the torsion tube on one end to remove it from the bracket.
After that, remove the drum and spring. We do the same thing on the other side to remove both springs.
If the drum or spring cone isn’t sliding properly, get a metal file and smoothen out any bumps on the torsion tube.
Step 6. Install the replacement spring
The next step is to install the replacement spring. Even if you only have one damaged spring, we always recommend replacing both.
You might be tempted to keep the intact spring, but it may do more harm in the long run. It’s only a matter of time before the old spring gets damaged, too.
When that happens, you’ll have to pay another replacement fee. It’s best to do it in one go, so you can save money and keep your garage door safe.
Step 7. Put the cables back
After sliding the new springs into the tube, we put the cable drum back and secure the tube back to its bracket.
Next, we re-attach the springs in the center using the original bolts. If you’re doing this on your own, ensure the bolts are snug. Too loose, and it will cause the spring to snap while winding.
Once this is done, we place the cable drum back. The safety cables must be fed into the drum properly before tightening the set screws.
Step 8. Wind the springs
The next and very crucial step is winding the springs. This part is best done by an expert to ensure proper tension level and to prevent accidents.
So how many turns do you need to do? We perform four quarter turns (one revolution) for every foot of the door height.
For a 7.5-foot door, ample tension requires 28 turns + 2 turns for a total of 30 turns. Taller doors will require more turns.
Avoid performing extra turns unless the spring is too loaded. In that case, you should only make one turn adjustment for each door test.
Step 9. Test the door
Once the torsion spring has been wound, the last step is to test the door. First, try lifting it manually to see if the door will glide smoothly.
If the door lifts too fast, the spring is too loaded; if it’s too slow, the tension isn’t enough.
If everything is working well, you can now connect the door opener. Again, test the door and see if there are any problems. After that, you’re all done replacing the springs!
How much does it cost to replace garage door springs?
Professional garage door spring replacement can range from $150 to $350. The cost would be higher, depending on the size and condition of your door.
Your choice of hardware will also impact the cost. And if your garage door is damaged, additional repairs will be needed.
Overall, replacing garage door springs shouldn’t cost more than one grand for most residential properties.
While DIY replacements may help cut costs, the risk isn’t worth it. You may get a bigger hospital bill if you get injured in the process.
Aside from that, spring replacements take so much work, so it’s wiser to have a licensed technician do it for you.
Safety tips when replacing garage door springs
Replacing garage torsion springs is both tricky and dangerous. But with trained hands, it can be performed without any snags.
Here are some safety reminders to keep in mind when replacing door springs:
Don’t try to repair garage torsion springs.
Once torsion springs are broken, there’s no way for you to repair them. Never attempt to re-connect the springs because they won’t hold up under extreme tension. You may even get injured in the process.
Observe a buffer zone
Never place your head too close when working on torsion springs. This is much so when winding or unwinding because the spring can snap at any moment. Observe at least 1 to 2 feet of distance at all times.
Keep your garage organized.
Many accidents stem from cluttered and disorganized workplaces. When replacing garage door springs, keep things in order and always have a clear space to move around.
Always use compatible winding bars.
It’s never a good idea to improvise when winding or unwinding torsion springs. ALWAYS use graded and certified winding bars compatible with the cone slots. The last thing you want is a winding bar that breaks in the middle of winding.
Get professional garage door spring replacement today!
Get professional garage door spring replacement today!
Instead of wasting your time and putting yourself at risk, you can get a professional garage door spring replacement. California Garage Door Repair is here to help!
We offer emergency door spring replacements 24/7. Our licensed technicians can reach you in as fast as 24 hours, depending on your location in Los Angeles. We guarantee fast, efficient, and affordable spring replacement services anytime you need them!
We can replace torsion springs for all garage door models. Call us, and we will get your garage door running in just a few hours.